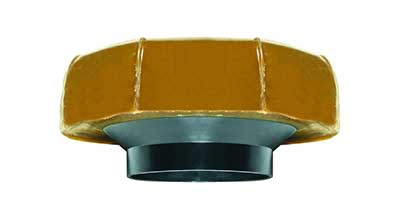
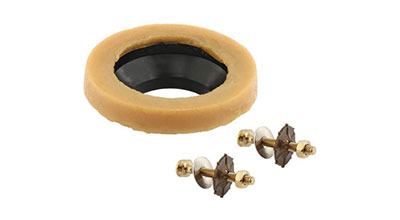
Have you ever gone to the toilet and noticed it keeps leaking water on the floor? The culprit here is the wax ring. A toilet wax ring forms a seal between your drain pipe and the bowl ensuring waste flows without spilling on the floor.
Unfortunately, with time, wax rings on a toilet breakdown with each year of use. If your toilet rocks every time you sit on it, those movements too speed up the damage. Once the seal becomes weak, gaps and cracks give way to water, making your restroom look messy.
While replacing toilet wax rings on a toilet is easy (and most plumbers know you can easily do it yourself), you could still be charged a lot for repairs and replacement.
Wax Ring Replacement Cost
Wondering how much it would cost to get a new wax ring installed? For starters, a toilet wax ring is inexpensive and costs somewhere between $2 and $10. However, the cost can go to upwards of $200 to include the plumber’s fee. Does $200 sound like a lot to you? Well, frankly, it is. But the good news is, replacing a wax ring is a DIY fix that both men and women can handle.
Toilet Wax Ring Sizes

Wax rings can have a diameter of either 3 or 4 inches. These are the only standard sizes available for toilet drain pipes. Besides diameter, the thickness too differs, and for this, you can get a regular model or an extra thick one. As you can see, this means you must determine exactly what size you need to stop the leaks once and for all.
To find out your toilet’s wax ring size, you’ll need to unbolt it from the floor, turn it upside down, and note down the diameter of the ‘elbow neck’. If you don’t want to go through too much trouble, you can use the old wax ring’s measurements if it has been working well for a long time.
However, if you have a recent replacement, then it could be possible someone who put it there did not use the right size, and you would now be forced to the toilet’s new measurement instead.
Before you dismantle the toilet, ensure the water tank is empty, the water inlet is off and all the water inside the bowel is emptied. You don’t want all that water messing up the floor and making the place more hazardous.
The Thickness of the Ring
As we said, there are only two thicknesses to get-regular and extra-thick. Your choice will mostly depend on the toilet flange (a small plastic or metallic piece above the drain pipe. If the flange is at the same level as your floor, get a regular thickness ring. You are only expected to go for the extra-thick if the flange lies under the floor.
Steps on How to Replace a Toilet Wax Ring

Here is how you can go about replacing a toilet wax ring:
Drain & Disconnect
First, you need to disconnect the water line by turning off the shut valve. Second, you need to flush the toilet, so there is no water left in the tank. Use towels or a suction tool to get rid of any little amount is remaining. It’s a good idea to have a bucket to fetch the little that will come out of the supply line.
There is still some water in the bowl, right? It should go too. Simply push it down the drain using a plunger and suck any remaining with a sponge.
Detach the Toilet
To detach the toilet, first, remove the bolt caps if there are any. Using an adjustable wrench, loosen and take out the nuts holding the toilet on the floor. Rust can make them hard to loosen. If this is the case, then first apply some oil on them and let it spread through the threads before trying again. When loosening nuts, be gentle as more pressure can break the anchor flange.
After you detach the toilet, move to a corner of the toilet to create more working space. If your toilet space is too small, consider moving the bowl a little further outside.
Dust Scraping
And now real work begins. Remove the old wax ring from the toilet and scrape off any remaining wax and dirt from the toilet. Using a putty knife, scrub the toilet flange and the bottom of the toilet to do away with wax and dirt sediments. You might also need to clean both areas, fix dents, and re-floor the place before replacing the new ring.
During this process, you really should wear gloves and get the windows wide open. Remember to shoe an old rug, towel, or a bunch of papers into the drain hole to block the bad smell.
Check the Flange
Sometimes the flange could be the reason your toilet keeps leaking. So, you need to inspect it, possibly remove old bolts, fix cracks and install new spacers (plus mounting bolts). This part is extremely mandatory for those whose toilets wobbled during their private sessions.
Install the Wax Ring
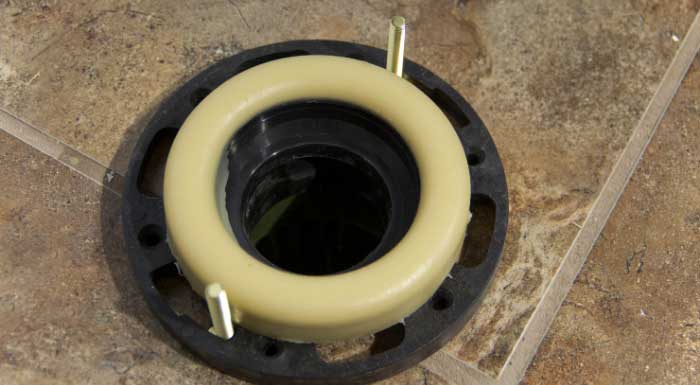
At this point, we would assume you have the exact size and thickness of the ring needed. While wearing gloves, remove the protective plastic peel that comes with the ring. This plastic is designed to come off easily without needing too much force. Now, affix the ring to the underside of the toilet bowl and get it properly centered.
Sometimes a wax ring can go onto the flange rather than on the underside of the bowl. Make sure to read the instructions that come with the product to ensure proper installation. You can gently press on the wax to help it stick to the toilet bowl. During this process, the shape of the wax can deform a little, but that’s okay.
Lower the Toilet Back to the Flange
Before you can do this, remember the rugs or papers stuffed in the drain hole? Get rid of those first. Now, slowly lower the toilet back to the flange, ensuring the flange and bowl’s bolt holes are properly aligned.
Sometimes the angle can go off a little so make sure to get this well centered. Once that is done, seat upon the toilet so your weight can press the wax into position. Shift your body weight so all the areas of the wax get pressed upon to foam a super tight seal. While doing this, do not rock the toilet too hard.
Cowabunga! The toilet bowl is back in its place. Put back the tie-down nuts and tighten a little for both sides. Don’t tighten all the way on one side and then go to the other side to do the same. No. You need to tighten a small bit on one side, then move to the other side…continuously like that, until they are all fully tight.
While we are here, be warned that over-tightening the nuts can crack the flange or porcelain bowl. So keep it tight just enough to stop the toilet from wobbling. Now, place back the toilet bolt caps, and that’s looking good now.
Reconnect the Tank and Water Line
So we are done placing the toilet back into its place. Place the water tank back, reconnect the water line and wait for the tank to fill up. When done, flush the toilet to see if your leakage problem is solved. If you are not good at following written instructions, check out YouTube for videos on how to install a toilet wax ring.
How Often Should You Change the Wax Seal on a Toilet?
Quite frankly, a toilet wax ring should last just as long as the toilet’s lifespan. But after 20-30 years of service, it should be ready for replacement. However, if your toilet is wobbling or you flush with hard and corrosive water, the wax ring will barely last 5 years.
Wrap Up
While replacing toilet wax rings on a toilet is easy, you must do right or keep on having a leaking toilet. So there are many things you must consider. If you have heated flooring, you should pick wax-free rings over waxed ones. It goes without saying that heat will melt the wax away.
Wax-free rings are reusable if still in good condition. This can be great when switching toilets as conventionally, one would have to invest in a new wax ring. However, both types work well in sealing the connection between the bowl and waste pipe.
Lastly, we understand DIY is a huge thing these days and everyone wants to save costs or become a serial DIY-star. Truth be told, replacing a toilet wax ring can be a little messy. So be sure to adhere to proper guidelines and safety standards. In case of doubt or any complication, speak to a plumber or check out more video tutorials for directions. Happy plumbing.
Relevant Reviews:

