
One of the most disturbing and scary bathroom disasters is a leaking shut off valve. One drop after another and before you know it, the entire floor is flooded and some of that water is heading into other corridors. Given that some bathrooms are smoothly tiled, this makes the floor even more hazardous.
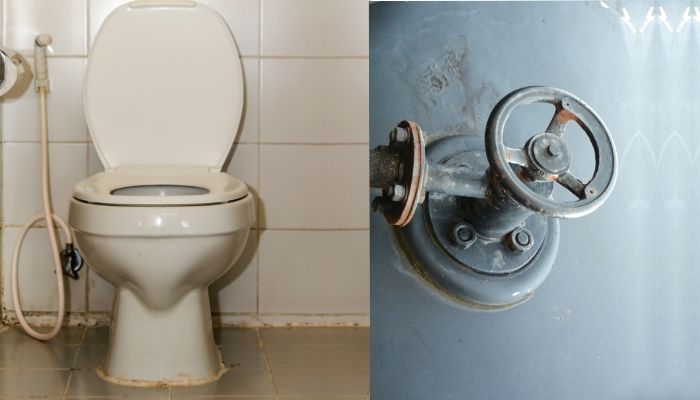
Shut off valves control the flow of water into the toilet tank. By turning the valve handle, you can allow or bar the flow of water. Within this contraption lies a seal that completely shuts off the water.
Since the valve is usually in active use and frequently exposed to hard water, faults are likely to occur. And when that happens, your toilet gets flooded-drop by drop.
In this guide, we are going to show you how to replace a leaking toilet shut off valve so you can save yourself some money and a little headache that comes with this task. Those dealing with toilet tank leaking problems, check out our guide on toilet repair kits.
Steps for Replacing a Toilet Shut Off Valve
What You Need:
- Putty/plumbers tape
- Pliers
- Adjustable wrenches
- Small bucket
- Shut off valve
A Few Pointers First
We know you want to get this process done ASAP. However, there are a few eye-openers that could save you countless hours of a troubling DIY session.
Firstly, how old is your home? Was it built in the 80s? If so then the piping is of cast iron and most probably corroded. Decoupling the shut off valve could crumble the piping system. This is one scenario where a plumber is needed.
If your connection is too sports copper plumbing, then joining the shut-off valve was achieved through sweating (soldering with a blowtorch). In this case, you need to cut through the joint which could require a professional.
Lastly, repairing your toilet shut off valve means there is no flow of water in the entire. So, you want to get everything for the job ready and close by to finish the job quickly so the other household activities that need water are not put on hold for long.
Step 1: Shut Off the Main Water
You already know where the main switch to your home’s water is, right? Get it turned off. This process is followed by draining off any little remaining water in the line by opening any faucet that is standing lower than the toilet shut off valve.
Step 2: Decouple Toilet Tank Supply Line
At this point, the hose that feeds the toilet tank with water is still attached. Use a crescent wrench to loosen the nut holding it to the shut-off valve. Once it is loose, pull it out. Before you detach this line, make sure to put a bucket under the valve.
Step 3: Detach the Old Shut Off Valve
And now real work begins. If you are working with a compression joint shut-off valve, you’ll need to open the nut holding it to the pipe. Before you start turning, get a good hold of the pipe using pliers so it doesn’t wobble. Discard the old valve.
If you are dealing with sweated joints, the process gets easier. Simply stage the tube cutter really close to the valve so only a small portion of the pipe is cut. Now, lock the cutter up and start turning for about 8-10 revolutions and a small part of the metal pipe will come off with the shut-off valve.
Step 4: Installing New Valve
You can’t just grab the new replacement valve and get it back. No. Some cleaning has to be done. When you removed the old shut off valve, sharp edges were created. Use a deburring tool to smoothen them up. To do that, just squeeze it in, turn it a couple of times and that’s done. This step is not applicable to those with PVC pipes.
For compression fitting, you will need to slide the nut back to the pipe first. Do this with the threads facing you. Next, slide in the ferrule/compression ring followed by the new toilet shut-off valve.
Before tightening the nut, you need to ensure the outlet is facing upwards so it can smoothly meet with the toilet tank’s hose. Now you can start to tighten the nut using your hands until it no longer turns.
Using pliers, hold the valve in place and place the crescent wrench on the nut for another turn. Now make a quarter or a half turn at the max ensuring a water-tight connection. When you turn on your water and see some drops, you can make another turn by either a quarter or an eighth.
Step 5: Connect the Toilet Water Supply Line Back
Now, get hold of the water tank supply hose and re-attach it to the valve’s outlet and tighten the nut up with your hand. You can also give it another half turn with a crescent wrench. If the outlet is awkwardly positioned, you will need to loosen the compression nut on the valve, get the positioning right, and then tighten it again.
Step 6: Turn Your Home’s Water Back on
Now that you are done replacing your toilet shut off valve, turn your main water back on use and store away your tools. You can check out tutorial videos on how to replace a leaking toilet shut off valve for some vivid instructions.
Wrap up
It’s quite astounding how much damage a 4-10 dollars shut off valve can do to your bathroom. But as you can see, the product is really cheap and can be replaced just as easily.
If you were to grab the phone and call a plumber, replacing the shut-off valve can cost you anywhere between $100 and $200. We know, that’s a crazy amount for such a small task. But with simple instruction highlighted in this article, you should now know how to replace a leaking toilet shut off valve.
Remember, not everything has to be a DIY jam session. If you are not handy, then admit it and let an expert help you out. Who knows, you can actually bargain and get this done fairly cheap with a local pro.
Related Resources: